Show Posts

This section allows you to view all posts made by this member. Note that you can only see posts made in areas you currently have access to.


Topics - JoeVallard

Pages: [1]
1
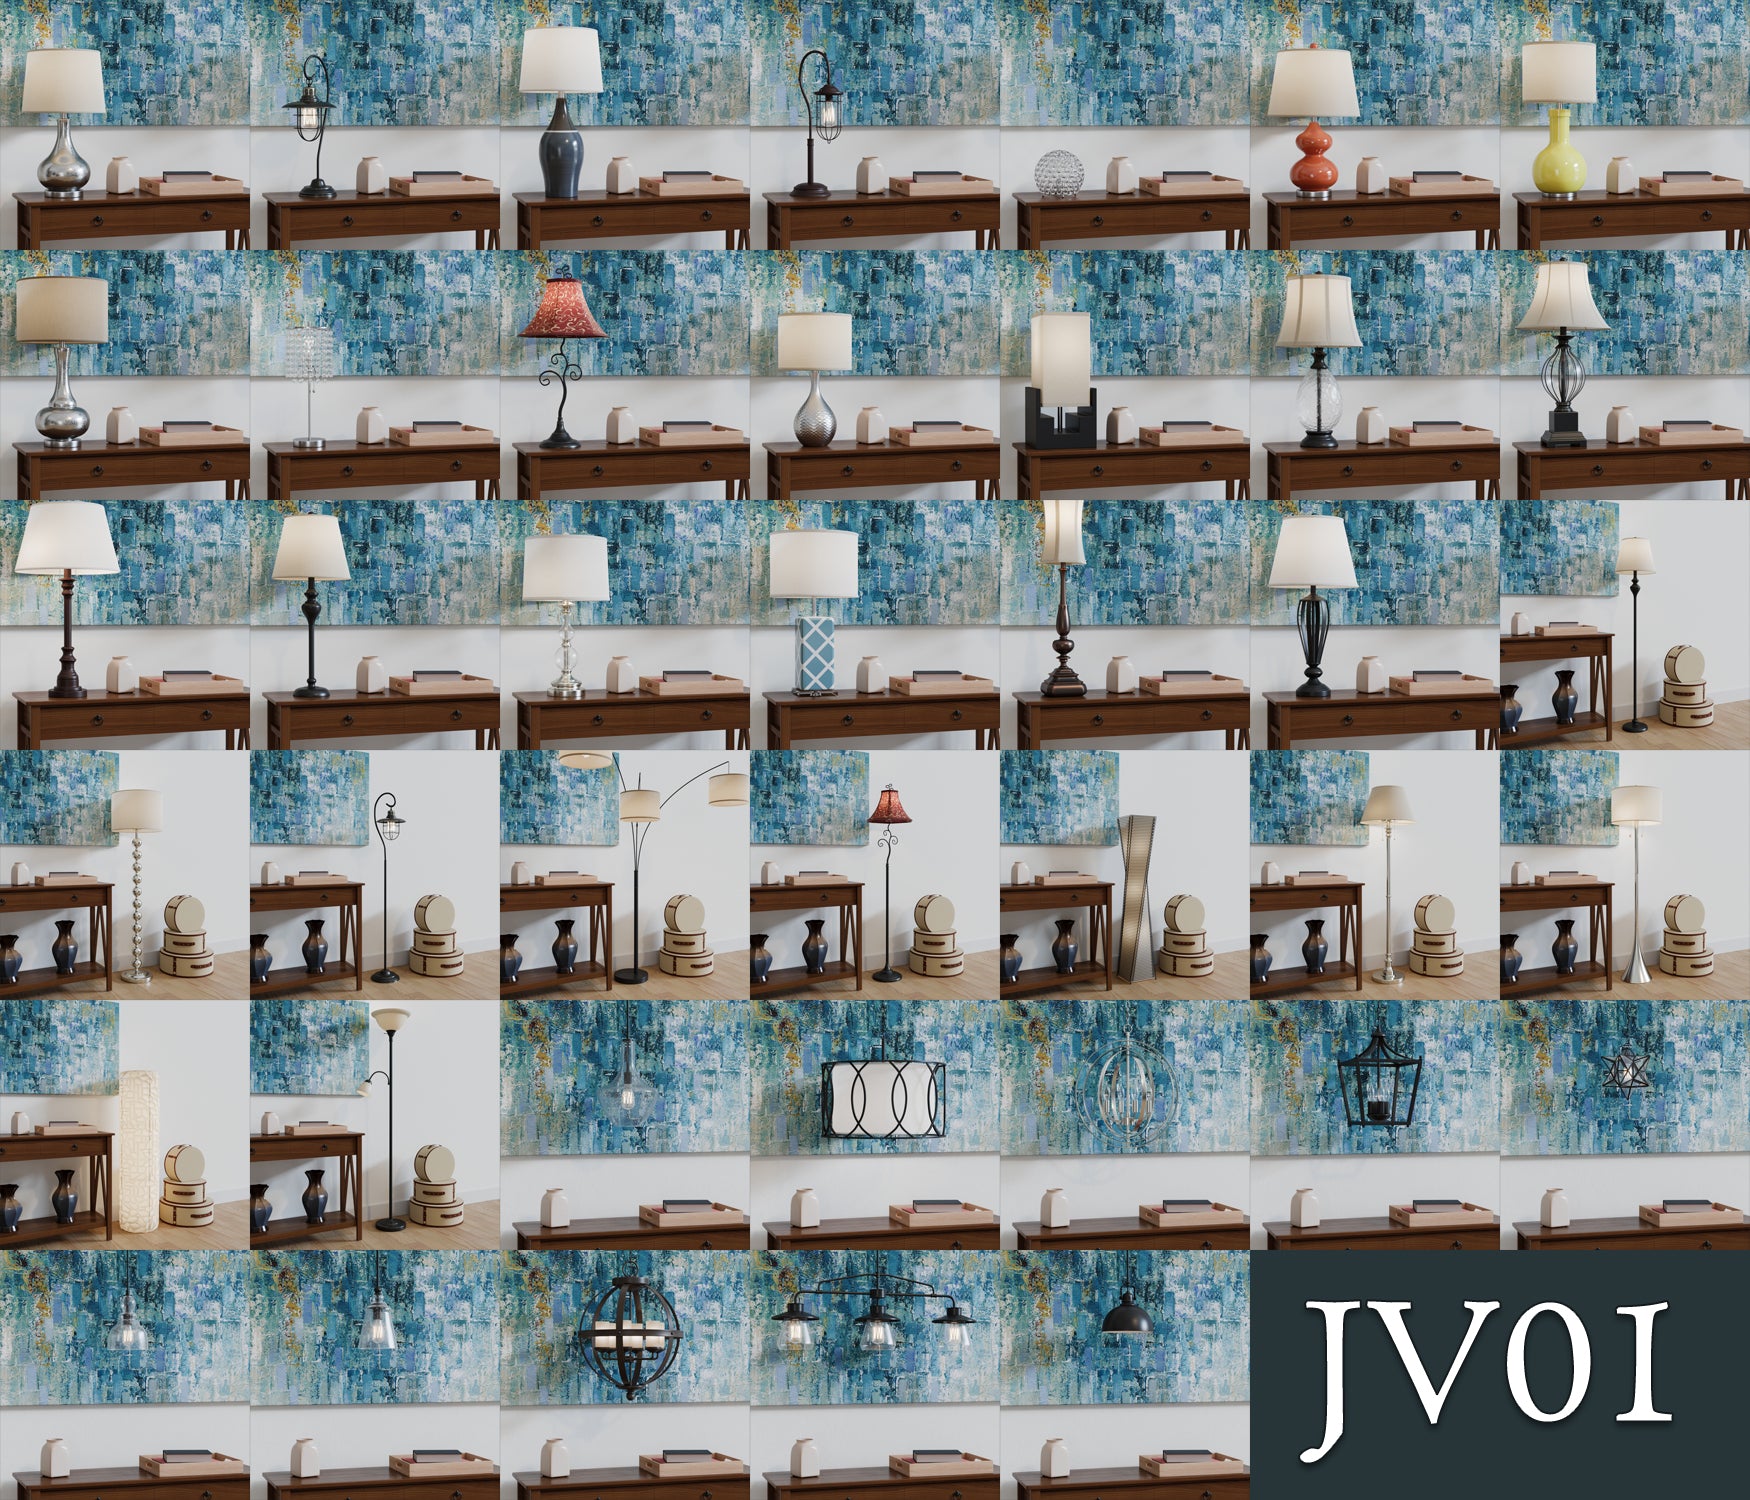
Decided to give selling some 3d models a try, so here's a few free ones to use in your renderings/animations Here. Feel free to take a look at the shop as well, you could use more Lamps right?

Free Table Lamp


Free Coffee Table


Free Chalkboard


The above lamp is part of this collection, you can buy the pack or individually pick the ones you like. 25% discount ends September 17th, discount code "VF0N8R93SKQP".


2
Gallery / Practice, practice, and more practice
« on: 2017-08-30, 00:44:29 »
I mostly lurk around on these forums and rarely post, but figured id start sharing.
Just a bunch of personal renders I've done over the years for learning, some were never finished so I converted them over to Corona and finished them off.


These health product renderings were for a contest over at freelancer, I did not win due to not willing to provide more renders for a couple dollars per render ¯\_(ツ)_/¯


Closeup of a Table Lamp, with dispersion.


Test Render on a refrigerator I was modeling


I'll continue to post my stuff here as I plan on doing some more soon, thanks for looking. C&C Welcomed.


3
Just like these forums I tend to do Archviz renders as well, but I've been wanting to do a 3d sculpt or photo scan of a person for awhile. It has been some time that I've opened up max (Forgot how to adjust the local axis.... yeah that long). So I figured a good start was to find some free 3d models around the net and make a skin shader.

Head model is Emily 2.1 from The Wikihuman Project.
Body model is by Infinite Realities from a VR project demo they did.

These are all straight from the Corona Frame Buffer, no post in anything else. The one angle from the front of the body and the lighting come from the front, doesn't look as good as some of the other renders, but I think it due to the texture resolution of the whole model is only 4k!

I think my next step will be trying out ways to add Hair. If anyone knows of a good tutorial for 3ds max Hair and Fur I would appropriate that, I tried searching myself but didn't come across much.


4
Here is a fast and simple way to get a Studio Render in Corona.

Modeling:
Create a plane below your model and add a Daylight System

 
Lighting:
Change "Position" to "Manual" and to your desired lighting.
Change "Sunlight" to "CoronaSun"
Untick "Skylight"
Change "Color" to "Direct Input" and pick whatever color you prefer. Mine was set to an RGB of 255
Optional* for softer shadows increase "Sun Size"


Materials:
Create a "CoronaShadowCatcherMtl" and apply it to your Plane.
Change the Reflections to your liking.


Insert a Color Correction map into the "Backplate" slot and turn the "Saturation" down to "-100"
Insert a "CoronaSky" into the Color Correction map slot.
Change "Sky Model" to "Raw-Fake (c)"
Set "Horizon Blur" to 1.0
Set your Ground, Zenith, and Horizon Color to your desired Studio Color. Mine was set to an RGB of 180.


Plug your "Color Correction" into your "Environment Map"


Now onto the most difficult and time consuming settings.

Render Settings
Change your "Production" render to "CoronaRenderer" and hit the "Render" button.


Adjust your Exposure settings during the render.


5
Simple render test with Grant Warwick' Material Ball.
http://www.grantwarwick.net/mastering-vraynew-page/

The material setup uses the same bitmap with separate composite mixes for Diffuse, Reflection, Glossiness, and Bump.

First Image is with Pyramidal Filtering, Blur Values of 1.0, 0.5, and 0.01
Second Image is with Summed Area, Blur Values of 1.0, 0.5, and 0.01
Third Image is with None, Blur Values of 1.0, 0.5, and 0.01

No filtering and 0.01 in the bump slot causes material problems. Which Keymaster does say Bump maps need some sort of filtering.
With these simple renders, No Filtering with any amount of blur produces the same render times, which are faster then any of the filters.

6
Gallery / Exterior Mansion Render
« on: 2014-07-12, 01:58:14 »
I made this render for a contest that is now over (I was closer to bottom 10 then 10 top.) The top 3 voted pieces won a computer, you can check them out here https://cypressinheritance.com/front/art-showcase/  (1st and 2nd pieces are on the 2nd page.)

This was my first real attempt at any sort of vegetation in a scene. Having only an i3 2120 and 8gb, it definitely pushed my computer to its limits. But scene parsing and secondary Gi computing was still reasonable.

There are a dozen of things I see that I would of liked to fix, most of them on the mansion. I am looking to improve so crits and comments will be greatly appreciated.

Pages: [1]