Show Posts

This section allows you to view all posts made by this member. Note that you can only see posts made in areas you currently have access to.


Topics - Byteman3D

Pages: 1 [2] 3
16
As you might have guessed, I need to align a target reticle plane one by one to a number of particles.

I moved the pivot of the reticle plane to the exact same position of my 360 degree panoramic camera. Assigned a look at controller to the plane with appropriate settings to look towards a SDeflector.

I moved the deflector one by one to each individual particle. I thought this would do the trick but particle positions change during rendering and I can't achieve targetting effect.

I know this may be due to several reasons related to the particle settings, but I did the alignment by moving the deflector into each particle, viewport displays %100 of particles.
I have attached the scene file, too.

Can you please help?

17
Hi,
I have a spare machine and thought it can contribute an animation render.
Communication seems ok but I get the following messages on slave node and master machine's Error Message(s) window.

I checked for the Map names but they don't correspond to any material maps in the scene.

I am rendering with Path Tracing+UHD cache, and enabled Load and Append UHD Map Option. Thought this could be the reason but tried even without GI. (And Cleared the UHD File name and saved the scene) - Still the same.

What is the problem here?

Edit: I tried to set the slave machine as master and  I 've got the errors on single machine rendering, too but this time Error Message(s) window presented options to select objects with missing maps. Missing Maps are from another renderer which is only installed on the first master machine.

This problem is solved but I still have a problem.

Two machines are not making the render faster. Instead two machines doubled the rendering time. There is this "collecting any extra data..." message which increases the rendering time with a long pause. What is that about?

18
[Max] I need help! / Face Mapping on Particles
« on: 2021-03-21, 23:53:05 »
Hi,

I'm trying to achive a spraying steam effect with a standard particle system. (I'm trying Parray) with a Radial Gradient Map assigned to the particle material's Opacity Slot. I need a single round gradient on each planar particle. (like in Standard Material/Face Map option)
I'm pretty sure I have done this previously, but I can't achieve the mapping. What am I missing?

edit: Pflow particle works as in the image but parray particle only displays correctly in the viewport- not the final render.

19

Although it is possible to fade in and out objects in editing software, I often find 3d Studio Max's visibility option more efficient to hide and unhide objects as it is done in single step. The former option requires more planning and separate rendering passes and changes in seperate steps is often prone to making mistakes.

Coming to the point, visibility also works for Corona Renderer but not for the features accessed via the Volumetric and SSS rollout. If my material has volmetric scattering radius set to a value other than zero. 0 visibility doesn't mean invisible.

I'm pretty sure there might be many other material attributes that are not affected by visibility, because it like that for some Max material attributes.
For many projects I reduce the scatter radius with visibility at the same frames to achieve fade out effect, but as you can imagine, the more parameters involved in a single effect, the harder it is to control.

Currently I am re-rendering some portions of an animation, due to unintentionally setting the visibility keys with a linear tangent while at the same time setting the translucency key with an eased tangent.
I have to be cautious whenever I need a change with that.

20
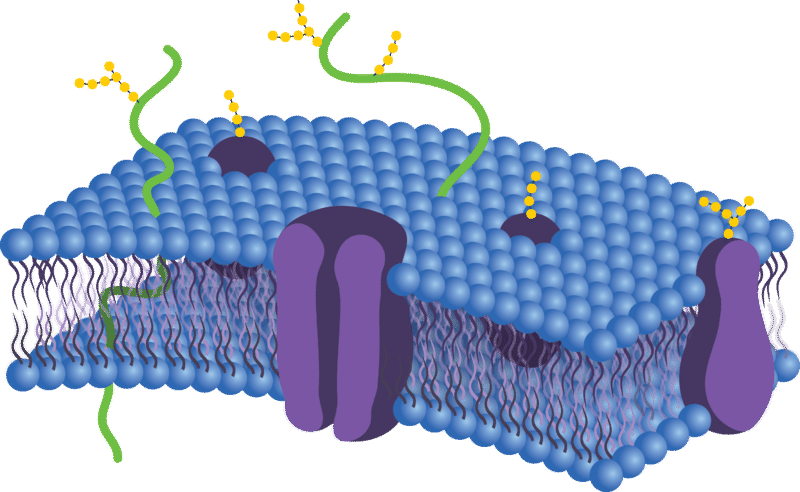
I'm rendering a cell membrane like the one in the image. I'm using Corona Scatter, thanks to the creators of this renderer, Scatter is highly efficient and reliable.
You might guess my scatter objects --the blue balls with legs on them-- I also added animated noise to the scatter surface so that my cell membrane looks alive, always in slight motion. Enabled Temporal Consistency so that scattered copies move with the surface, but right at the edge of my scatter surface, some of the scattered objects disappear and re appear (Due to the noise movement for certain) Not only appear and disappear but as one disappears others appear due to the empty space - or so I think.

I must add one more detail, that my scene size might be causing trouble. This was a tiny portion of a very large eye object. The eye extents were about 240000 centimeters, and the tiniest atom object in the cell was 0.02 cms. This size difference is way large for 3dsmax to handle together. My tiny objects were indeed shaking during a straight motion.

That is why I have seperated the scenes. Brought the cell portion closer to the origin and deleted even the camera motion other than  the 50 frame close up and zoom out sequences, and the cell animation in between those.

I haven't rescaled the cell as the shaking movement of the straight moving objects are no longer noticable. Precision problem seems to be solved but this scatter problem.

Is is common for scatter objects to come and go arbitrarily at surface edges with noise modifier, or is this still related to the scene scale? As I look at the scattered copies far from the edges , I see not even a single one disappear. This is about the edge.
What do you recommend?

Edit 3: Limiting the noise to only to Z axis does not help. 


Any ideas?


21
[Max] I need help! / Nesting Multi-Sub Object Materials
« on: 2020-12-25, 11:02:26 »
Is there any possible way to blend (nest) multi-sub object materials with a second material to fade between each other?
Neither Blend nor Layered Material works as you know? Is it currently not possible?

22
[Max] I need help! / Fading Out Objects Help
« on: 2020-12-24, 16:26:33 »
I need to make objects with Corona Materials disappear at certain frames of the animation. Material has some Volumetric Scattering and translucency. 0 Invisibility turns the object into a reddish and still visible holo. Blend material is just the same, so is the 0 opacity. I have tried layered material as well. No way!

I haven't yet tried reducing all translucent parameters with opacity but I wish to have a single parameter control for easy fade in and out.

Is there any possible way in Corona?

edit: Decreasing Opacity seems to work when there is no volume scattering but a nice gradual fade effect is possible only if there is no scattering or the scattering distance increases while the opacity decreases.

another edit: Layered material actually works when the base material is set as the transparent and o layer material as the scatter material :D


23
[Scatter] I need help! / Scatter Objects as Particle Shapes
« on: 2020-12-13, 14:23:01 »
Corona Scatter is a very useful tool for medical animation. It handles vast number of particles over surfaces without having to display them at detail levels which is hard to cope with, even for a high end computer. I wonder if it is possible to use it with particle flow integration and disintegrate the scattered objects as particle shapes, without collapsing the scatter source into a mesh?


24
[Max] I need help! / Need help to correct Corona Exposure
« on: 2020-11-26, 16:16:39 »
I'm rendering two versions of an animation project, parts of which are quite the same. I have rendered version one entirely, and I was planning to render the different plans of the version two only and get the rest from version one. Unfortunately I have rendered the first version with exposure set to -0.5 while left the second version 0 as default.

Now I need to correct the exposure of one of the frame sets to match the other. I can try to match by trial and error but I wonder if anyone can tell me the exact value of a certain exposure workflow which will match this 0.5 eV shift in Corona?

25
[Max] Feature Requests / Rendering Performance Suggestion
« on: 2020-09-06, 06:23:25 »
Hi,
I've been trying to catch a deadline waiting for an animation to finish for about a week. Currently each frame takes 67 seconds to finish and total expected rendering time is reported as 51 hours. I just thought what if I hide the exterior objects while the camera is inside, it should at least reduce some object preparation, and in the course of 2500 frames, even a 2 second gain matters.

I hid the objects and the rendering time is reduced down to 31 seconds. This is a serious gain.

It may not be possible but, an object visibility check after the camera motion is determined and auto hiding the occluded objects would drastically improve rendering time. If it can be done fast enough this might even improve the rendering times of still renders.

Regards

26
[Max] I need help! / Matte/Shadow (Shadow Catcher) Help
« on: 2020-07-27, 10:17:31 »
I'm trying to mask some objects in the foreground by using Shadow Catcher material but I don't want the Shadow Catching foreground objects to receive any shadows, reflections (diffuse GI whatsoever).
I just want the Shadow Catcher assigned objects to appear transparent in Alpha Channel. There is always a diffuse reflection like AO in Alpha of the shadow catcher objects.
I have turned down reflection and shadow (to 0.1) as well for the Shadow Catcher material.

I guess it is due to some sort of GI coming from the HDR in the Scene Environment. How do I turn it down?

Thanks


Edit: I see from this tutorial that I need to use a RaySwitch Material (or map) to handle the job, however I still couldn't figure it out.

https://coronarenderer.freshdesk.com/support/solutions/articles/5000529341

The attachment images contain full building, one of the parts of the building that's supposed to rise out of the full plan and come forward towards the viewer. There is also the alpha I'm trying to get rid of. The black blocks receiving illumination in alpha are shadow catcher objects.

I was actually trying to assign the catcher material to all other parts of the building and render the part that is supposed to come out with real materials, but as the GI or shadows in Alpha didn't give a good result (There were never dissappearing grains and shadows different than those on the full building image) I put the seperate rooms in alpha boxes. Tried to render without any shadows on catcher objects. I couldn't get rid of the GI reflections on catcher materials.


27
Hi I'm working on a presentation to display certain parts of a building.

I wish the entire building to stay at the back, somewhat faded as a sort of wireframe, and the rooms to be displeyed will come to the front as a full render version just as in the sample image.

I'm still working on it but I couldn't find a better material alternative for the background wireframe model. It doesn't necessarily be wireframe but I wish to make it more distinct. May be more Hidden Line rendering (Background Occluded lines less visible) The building also has two floors. Lower floor is not to come forward but it is there and it should be more faded may be.

Any material suggestion fading by distance is appreciated. Please feel free to recommend your choice of rendering such a scene any ink-paint material plugins etc. compatible with Corona.

28
I have a 3d building plan scene with a hundred materials assigned to the objects. Walls, tables chairs etc. I wish to fade all rooms (to a transparent or wire -technical drawing style- material) except one to reveal its details. The revealed section will be in original materials. Then it will be faded while another room is revealed back to its materials.

I can do it with material morphing, attach several objects then I'll then blend the multi sub object material into the faded material.

I just wonder if it is possible to do it without attaching objects and directly to groups?

A second question is do you have any material recommendation for the faded material type to make it look appealing and not a crowded line mess? Some transparency some wire some falloffs... Wireframe rendering is definitely a mess for what I'm trying to do. :)

Thank you


29
I have rendered a 400 frame 360 degree stereoscopic medical animation that consists of a boxfull of mParticles. (See attachment)
Particles represent 3 particles in the blood. (Neutrophyl, Macrophage and Natural Killer Cell) My camera is in the middle of the box, surrounded with a collision sphere so that particles don't come very close to the camera. Scene is rendered perfectly.

I need to add the names of these three different particles on one of each type over the rendered frames.

As the viewport is not capable of correctly previewing 360 degree projection, it is very hard to place the text in the correct position.
I noticed -however- that Interactive render somehow moves the particles to the correct position in the viewport. (Just as in the rendered image) I determined the particles which I'll link the texts to, displayed their particle IDs and linked the texts to three particles by using Script Controller.

When the Interactive render window is active, (After moving the time slider one time) I see the texts perfectly aligned throughout the entire animation. Texts move with their corresponding particles. They are in the middle of the rendered image as they should be.
If I start production render the texts move to the lower left corners of the stereo pairs, totally incorrect place.

Only moving the time slider in IR mode updates the text positions to the correct place. (See the attachment with region render)
I'm literally out of ideas. What might it be, that updates the text and particles during interactive rendering, but not in the final rendering?

Edit: I ve attached the 2020 version Max file file for those who are interested in. It is originally created with Max 2020. (Saved from Max 2021 though) Didn't include the maps as they are only background files. I tried to convert it to the oldest version possible to make the file available to more folks around here, but the  particle positions change completely when converted to version 2018, so the oldest version I could save was 2020.

30
[Max] I need help! / Help on Constantly Crashing Scene
« on: 2020-03-17, 11:49:16 »

https://drive.google.com/open?id=1zSURcrmreRLzAyqOw8jMpMSfClMRTJx9

This is a 3dsmax archive file of a 2350 frame stereoscopic VR animation scene I'm working on.

The scene is created on 3dsmax 2020 Update 3 and frequently crashes (especially after frame 1450) while being rendered with Corona 5.

I've tested the scene with a Ryzen TR PC with 128GB ram, too, so I believe it is not a low memory issue.

The two omni lights at the center of two spherical objects are supposed to emit volumetric lights with 3dsmax's native Environment Volume Light effects. It is visible until frame 1500, and scene rendered fine until around 1450.
After frame 1450 both spheres gradually become invisible (via invisibility), two instanced omni lights' intensity gradually decreases by the Multiplier parameter. They're totally off after frame 1500.
(Rendering time at frames 1450-1500 are relatively long compared to other frames probably due to visibility change. Rendering times change from 3 minutes to 20 minutes)

They're currently both turned off. I have even tried deleting them but I could at best render 50 frames without a crash, and at  worst had an immeadiate crash.

There is an HDR file in Corona Environment and a Sunlight illuminating the scene. One of the two seems to be worsening the isssue as I have once rendered the scene completely without any lights, but only a white colour as Environment. Crashed a few times at the time though.

I appreciate if you can help me find the culprit. Right now I'm sitting in front of the PC waiting to restart rendering at every crash.

Pages: 1 [2] 3